


Why do users abandon onboarding halfway through?
Why does a feature your team spent months building go completely ignored?
Why do customers drop off right before checkout?
The answer is rarely the price, the market, or bad timing. It's almost always a usability problem your team can't see because you know your product too well to experience it the way a first-time user does.
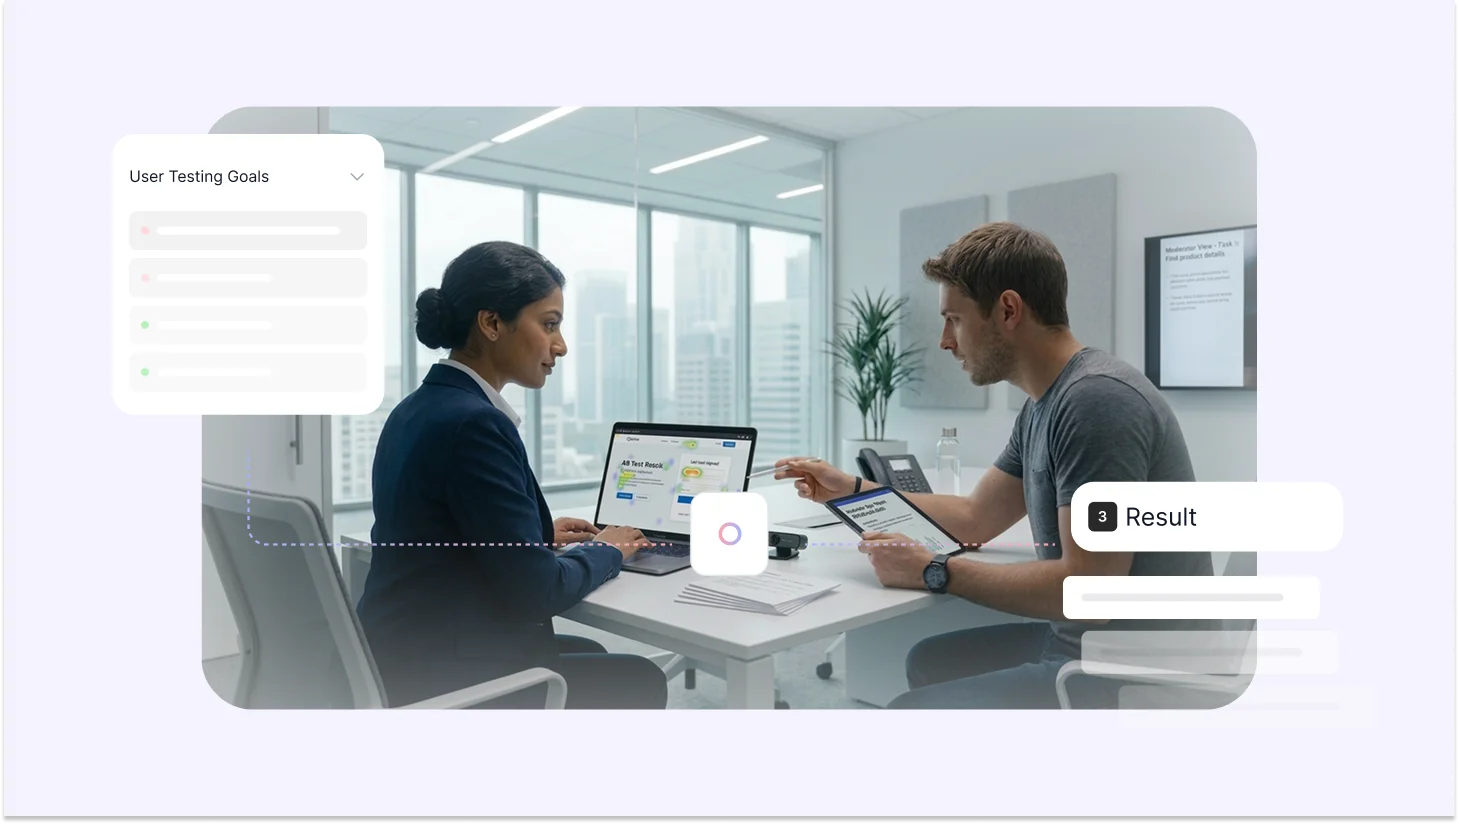
That's exactly what user testing is for. You put real users in front of your product, give them real tasks, and let their behavior tell you what no survey or analytics dashboard ever could, where your product genuinely works, and where it's quietly falling apart.
Done right, it reduces risk, lifts conversions, and gives your team the evidence they need to make faster, better decisions. Done wrong, it produces a deck full of quotes nobody acts on.
TL;DR
User testing helps you uncover usability problems that analytics and surveys miss. In 2026, as AI accelerates product development, rapid validation is more critical than ever.
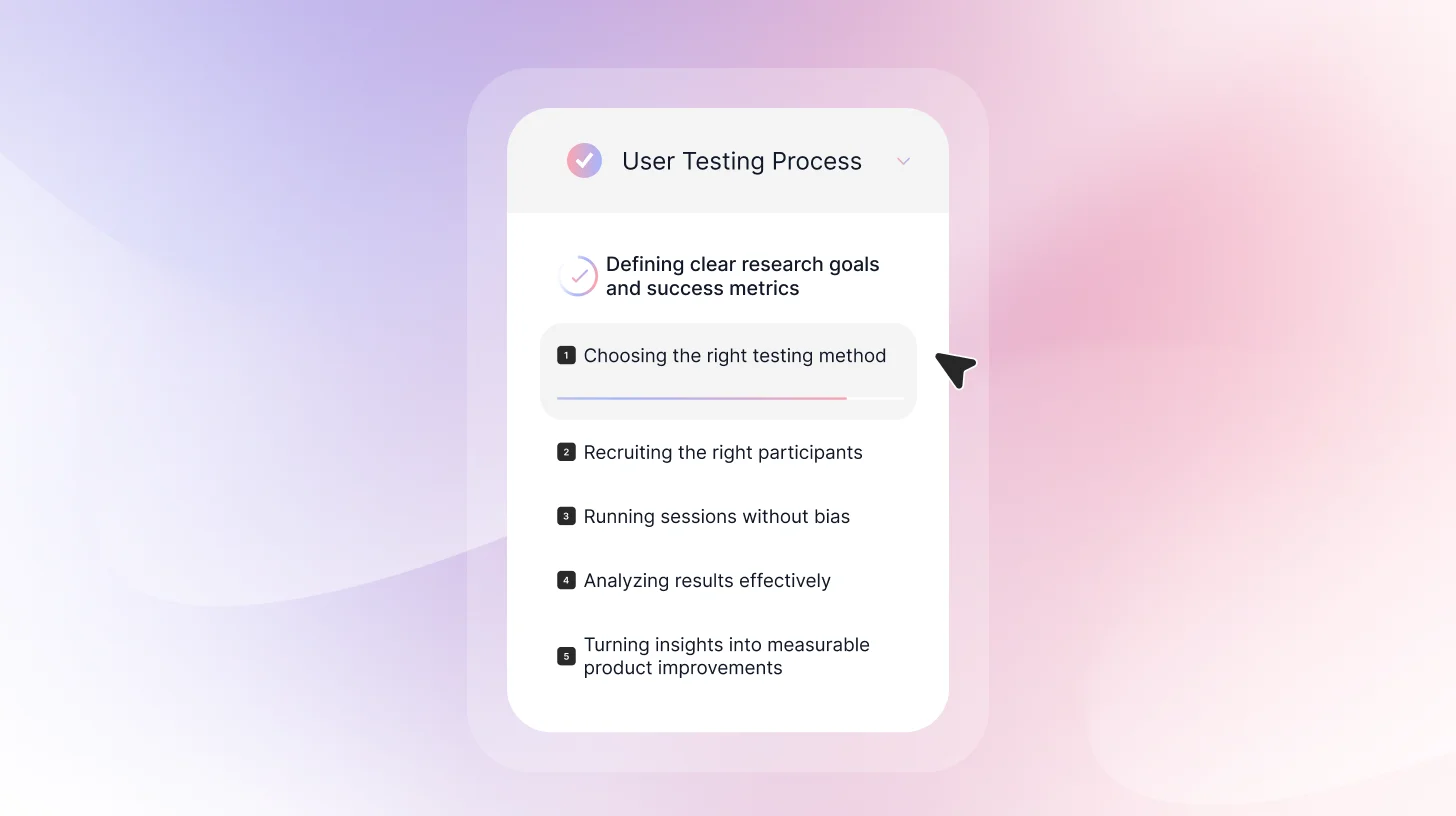
This guide walks you through the user testing process that includes:
- Defining clear research goals and success metrics
- Choosing the right testing method
- Recruiting the right participants
- Writing realistic task scenarios
- Running sessions without bias
- Analyzing results effectively
- Turning insights into measurable product improvements
If you're still getting familiar with what user testing actually is, start with our complete guide on user testing before diving into the process.
Why User Testing Matters More Than Ever
In 2026, vibe coding, coined by Andrej Karpathy in February 2025, has transformed development. You describe an app idea in natural language ("vibes"), and AI tools generate working code in hours or days. Prototypes that once took weeks are now launched overnight.
Industry reports confirm the shift: 78% of organizations integrate AI into core workflows (Stanford AI Index 2025 / McKinsey), with development velocity soaring and non-coders building real MVPs.
But speed alone creates flops. Vibe coding excels at fast generation, yet AI often hallucinates features, ignores usability basics, skips edge cases, accessibility, or emotional fit. The output can look impressive in demos but frustrate users, spike bounces, and demand heavy rework.
That's where user testing becomes essential. To harness AI's exponential pace, adopt testing at the speed of AI (rapid "vibe testing"): lightweight human validation after every major prompt or agentic iteration.
Why user testing wins in the AI era:
- Exposes AI blind spots: Real hesitations, cultural nuances, accessibility issues, and emotional friction that no LLM predicts.
- Cuts rework costs: Fix problems before scaling vibe-coded features to production.
- Delivers proven ROI: UX-focused testing drives up to 400% conversion gains; the gap grows in AI-slop-filled markets.
- Secures product-market fit: In a flood of vibe-coded apps, intuitive, human-centered ones stand out.
TheySaid runs AI-moderated user testing that uncovers real usability issues, emotional friction, and drop-off risks before they cost you conversions.
Start Free Test
How to Conduct User Testing: Step-by-Step Guide for Beginners
Following clear user testing guidelines ensures your sessions are structured, unbiased, and focused on real user behavior rather than opinions.
Step 1: Define Your User Testing Goals and Research Questions
Before conducting user testing, it’s important to get crystal clear on what you're trying to learn. Vague goals lead to vague insights, and in a world where AI can ship a product in hours, vague insights are even more expensive. The faster you build, the more precisely you need to know what to fix.
Start with what you need to decide. Once you know what you're deciding, frame it as a research question.
Strong research questions are:
- Specific
- Behavior-focused
- Measurable
- Time-bound
- Linked to business outcome
Weak question: "Is our app good?"
Strong question: "Can new users create their first budget within 5 minutes without any help?"
Weak question: "Do users like the new design?"
Strong question: "Can users find and book an appointment using the new navigation?"
See the pattern? Strong questions are specific, measurable, and tied to actual user behavior.
Set Success Metrics Before You Start
Don't wait until after testing to decide what counts as success. Define your benchmarks upfront:
- Task completion rate: For example, 80% of users should successfully complete checkout
- Time on task: Account creation should take under 3 minutes
- Error rate: Users should find the settings without any false starts
- Satisfaction score: Users rate the experience 4 out of 5 or higher
Step 2: Choose Your Testing Method
The effectiveness of your user testing depends largely on selecting the right testing methodology. Different testing approaches generate different types of insights, and each comes with its own strengths and limitations.
In-Person or Remote Testing
In-person sessions provide greater control over the testing environment. You can minimize distractions, observe body language more closely, and ensure consistent conditions across participants. This can be particularly useful when evaluating physical products or complex workflows.
Remote testing, on the other hand, allows participants to engage with your product in their natural environment, using their own devices and routines. This often results in more realistic behavior. However, remote sessions can introduce variables that are harder to manage, such as environmental distractions or technical inconsistencies.
Most digital usability testing can be conducted remotely without compromising insight quality. The decision typically comes down to the level of environmental control required and the resources available.
If you're leaning toward remote, here's everything you need to know about running remote usability testing effectively.
Moderated or Unmoderated Testing
In moderated testing, a researcher is present to guide the participant through the session. This format allows for real-time clarification, follow-up questions, and deeper exploration of user decisions. It is particularly useful when testing early prototypes, including AI-generated ones, where hallucinated features and unexpected edge cases are common.
Unmoderated testing removes the facilitator from the session. Participants complete tasks independently, often through a usability testing platform. This approach allows for faster data collection and larger sample sizes, making it well-suited for measuring task completion rates or validating defined workflows.
It is important to recognize that moderated sessions, while rich in qualitative insight, may introduce subtle researcher bias. Even neutral prompts can influence how participants respond. Unmoderated testing reduces this risk but limits the opportunity to probe deeper into user reasoning.
For a full breakdown of every testing type and when to use each, read our guide on the 10 types of user testing.
Qualitative or Quantitative Research
Qualitative user testing focuses on understanding motivations, expectations, and thought processes. It provides depth and context but is typically conducted with smaller sample sizes.
Quantitative testing emphasizes measurable outcomes such as completion rates, time on task, and error frequency. It requires larger participant groups but provides statistical confidence.
In many cases, combining both approaches produces the most comprehensive understanding of usability performance.
Your research questions determine your method:
- Understand why users behave a certain way? Run Moderated testing (ask follow-up questions)
- Test lots of users quickly? Try Unmoderated remote testing
- Testing something early or conceptual? Moderated testing with low-fi prototypes is best
- See users in their natural environment? Run Field testing or contextual inquiry
- Want quantitative validation? Try Unmoderated testing with larger samples
If you're unsure how user testing and usability testing differ and which one fits your goals, here's a full breakdown.
Step 3: Recruit the Right Participants
One of the most common questions in user testing is: How to Recruit Participants for User Testing?
The answer depends on the type of research you’re running.
Recruiting “anyone available” is one of the biggest mistakes teams make. A short screening survey helps you find the right participants.
Your screener should filter based on:
- Demographics (only if they truly matter to your product)
- Behavioral criteria (How often do they use similar tools? Have they done this task before?)
- Disqualifiers (UX researchers, direct competitors, friends, or family members)
Once you know who you’re looking for, choose the right recruitment channel. You can source participants through:
- Your existing customer base
- Email lists
- Social media or community groups
- Paid participant panels
- In-app intercepts
- LinkedIn for B2B testing
If you're testing a live product, current users are often your best source of realistic feedback.
Offer appropriate incentives. Fair compensation increases show-up rates and ensures participants take the session seriously. The amount should reflect the complexity of the task and the expertise required.
Typical ranges look like this:
- Consumer participants: $50–75 per hour
- B2B or professional users: $100–200 per hour
- Highly specialized or niche experts: $200+ per hour
Step 4: Prepare Your Usability Test Tasks and Scenarios
Before you bring in participants, make sure your test is actually ready.
Write Realistic Task Scenarios
Don’t tell users exactly what to click. That’s not testing usability, that’s giving directions. Instead of walking them through the interface, describe a situation and a goal.
Bad: “Click on the Budget tab and create a new category.”
Better: “You want to start tracking how much you spend on groceries every month. How would you set that up?”
When writing tasks:
- Give context
- Make the goal clear
- Keep it realistic
- Avoid naming buttons or menu labels
Well-written tasks reveal where users hesitate, guess, or take the wrong path. Poorly written tasks hide usability issues by steering participants in the right direction.
If you're testing at the prototype stage specifically, here's a dedicated guide to prototype testing and how to approach it.
Step 5: Structure Your Discussion Flow
Kick things off with a quick introduction. Thank the participant for showing up, make it clear that you're testing the product, not them, grab consent to record if you need it, and remind them to think out loud while they're working through things. Getting this stuff out of the way early takes the pressure off and helps people relax.
Before you dive into the actual tasks, make sure everything's set up properly. For remote tests, check that the audio's working, screen sharing is on, and recording is rolling. For in-person sessions, grab a quiet room, sit next to the participant (not across from them like it's an interview), and clear out anything that might be distracting. When people are relaxed and the setup feels right, they'll behave naturally, which is exactly what you want.
Here are 30+ user testing questions and a funnel framework to guide you.
Step 6: Run the User Testing Session
Once everything is structured and set up, it’s time to run the test.
During the session, your role is to observe, not to guide. Give participants the task, then step back. Avoid explaining features, correcting mistakes, or hinting at where they should click. If they struggle, let them struggle. That friction is the insight.
Stay neutral in your responses. Avoid phrases like “good job” or “that’s right,” which can unintentionally influence behavior. If they ask for help, gently redirect with questions like, “What would you expect to happen here?” This keeps the session focused on natural interaction.
Take structured notes while observing. Record task success or failure, hesitation points, navigation paths, and emotional reactions. Capture exact quotes when possible. These details make the analysis faster and more objective later.
Step 7: Analyze Your Results
Analysis should happen quickly, ideally within 24 hours, while everything is still fresh. Rewatch recordings, fill in missing notes, highlight strong quotes, and begin identifying patterns.
Not every issue carries the same weight. If one person struggles, it may be an outlier. If three or more encounter the same problem, you likely have a real pattern. Track findings clearly by noting the issue, how many participants were affected, and how severe it was.
Classify issues by impact.
Critical problems block task completion and should be fixed before launch.
Major issues cause significant frustration and should be addressed in the next sprint.
Minor issues are small annoyances that can be added to the backlog.
When prioritizing fixes, think in terms of impact versus effort. High-impact, easy fixes should be handled immediately. High-impact but complex issues require planning. Low-impact items may become quick wins or may not be worth addressing at all.
Note: It’s important not to confuse usability testing with user acceptance testing guidelines, which focus on verifying that a product meets business requirements before release rather than identifying usability issues.
Step 8: Turn Insights Into Clear Product Actions
User testing only creates value when insights lead to change. If findings stay in a slide deck, nothing improves. The real outcome of user testing isn’t a report. It’s better product decisions.
Start by turning observations into clear problem statements. Avoid vague summaries like “users were confused.” Instead, describe what happened, how many users were affected, and where the friction occurred. Specific, behavior-based findings are easier to prioritize and harder to dismiss.
Next, connect each issue to a business outcome. Does it block task completion? Slow onboarding? Reduce conversions? When usability problems are tied to metrics, they become actionable rather than optional.
Assign ownership for every major fix. Define what will change, who is responsible, and how success will be measured. Without accountability, even obvious issues can stall.
After implementing improvements, test again. User testing is a loop, not a one-time event, and when repeated consistently, this approach becomes a practical user testing framework your team can rely on for ongoing improvement.
User Testing at the Speed of AI
Build fast with AI. Validate faster with TheySaid. AI-moderated sessions, automatic insights, zero manual analysis.
Book a demo!
The Smarter Way to Test Before You Ship
The steps above represent best-practice user testing the traditional way, and they work. But if you're shipping at the speed AI enables, running each of these steps manually becomes the bottleneck.
That's the problem TheySaid was built to solve.
Instead of coordinating researchers, recruiting participants separately, and spending days on analysis, TheySaid handles the entire process in one place. You describe what you want to test, and AI builds the test plan tasks, follow-up questions, and the user journey included. Participants join through a browser link with no downloads required, and an AI moderator guides them through each task in real time, asking follow-up questions and probing for confusion the way a trained researcher would.
Once sessions are complete, you don't get a raw pile of recordings. You get automatically grouped themes, task success metrics, timestamped video clips of key moments, and prioritized recommendations so your team can see exactly where users struggle and why, without sitting through hours of footage.
The result isn't just feedback. It's a clear answer to the question every product team actually needs: what's broken, where it's broken, and what to fix first.
FAQs
What are common mistakes in user testing?
Common mistakes include recruiting the wrong participants, writing leading task instructions, guiding users during sessions, waiting too long to analyze results, and failing to turn insights into action.
Can I do user testing on a prototype before building anything?
Yes, and it's one of the highest-ROI moments to test. Catching a fundamental usability problem in a Figma prototype costs almost nothing to fix. Catching the same problem after six weeks of engineering work is significantly more expensive.
What are the essential steps for effective user testing?
The core steps are: define a clear research question, choose the right testing method, recruit participants who match your actual users, write realistic task scenarios, run sessions without guiding participants, analyze results within 24 hours, and turn findings into prioritized product actions. Each step builds on the last; skipping recruitment screening or writing vague tasks undermines everything that follows.
What should be on a user testing checklist for e-commerce platforms?
E-commerce testing should cover the full purchase journey: can users find the product they're looking for, do they understand pricing and shipping costs before checkout, can they complete a purchase without friction, and do they trust the checkout experience enough to enter payment details? Beyond the funnel, test search and filtering, product page clarity, and error recovery, what happens when something goes wrong? These are the moments where most e-commerce revenue is quietly lost.

.png)


.svg)


